
The Issue of Windows 10 Automatic Update
Nowadays, many computer users complain that Windows always automatically installs some updates. And they want to know whether there is any solution to disable Windows 10 update permanently because some extra problems will occur after Windows update. For example, Windows update may give rise to data loss. Or a Windows update can’t be installed successfully due to error 0x800F0830-0x20003.
Thus, do you know how to stop Windows 10 updates automatically downloading? If no, this post will show you how to stop Windows 10 update permanently with 7 effective solutions. So, just keep on your reading.
Quick Video
Solution 1. Disable Windows 10 Update Service
In order to turn off Windows 10 update, you can try to disable Windows Update service which automatically downloads and installs the Windows 10 updates over the Internet. And in the following part, we will show you how to stop Windows 10 Update Assistant with step-by-step guide.
In this article, we will show you how to stop uploading updates to other devices on Windows 11/10 in different situations.
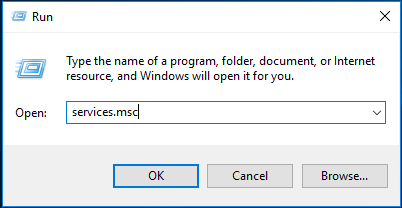
Step 1: Open Service window
- Press Windows key and R key together to open the Run dialog.
- Type services.msc in the box.
- Click OK or hit Enter to continue.
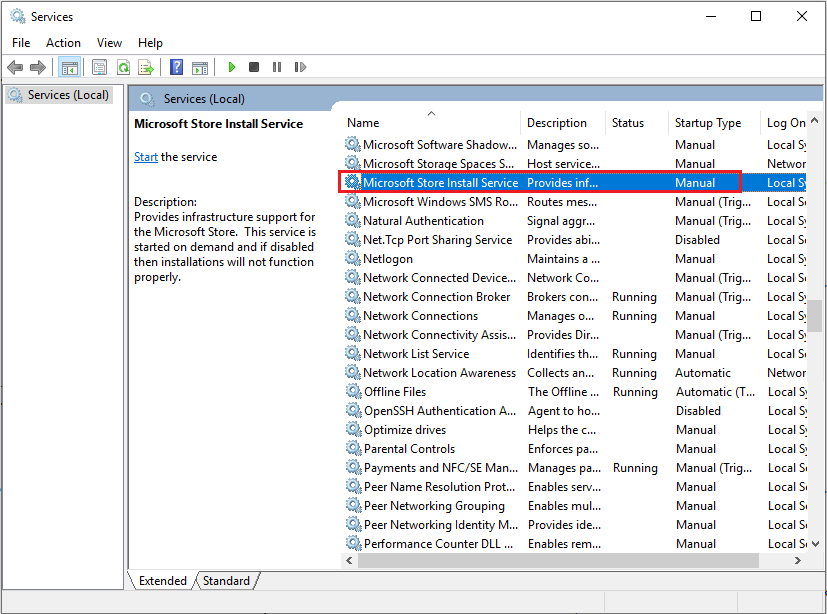
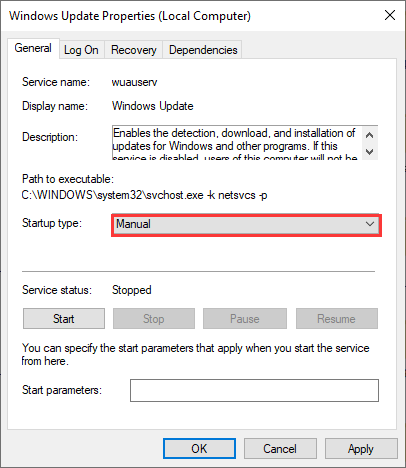
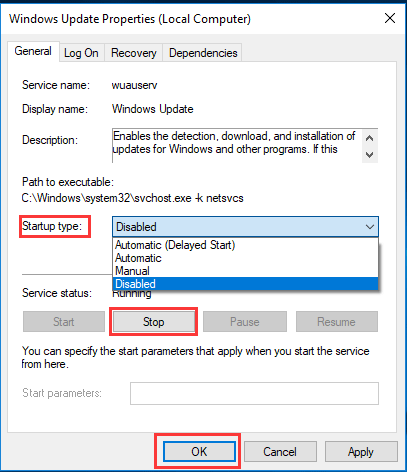
Step 2: Disable Windows Update service
- In the services window, please find out the Windows Update service and double-click it.
- In the popup window, change the Startup type to Disabled. Then change the Service status to Stop.
- Click Apply and OK to execute the changes.
After you have finished all steps, you can restart your computer to take effect to stop Windows 10 update.
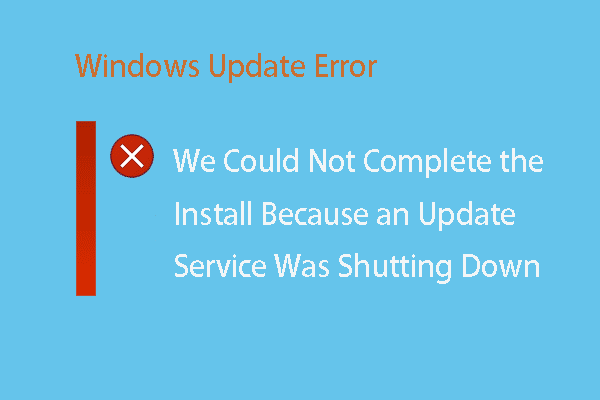
This post shows how to fix the error that we could not complete the install because an update service was shutting down.
Solution 2. Change the Group Policy
As for how to stop Windows 10 update, you can try to change the Group Policy. And the following steps will show you how to change the Group Policy in detail to stop Windows 10 update download in progress.
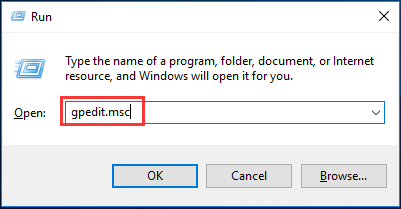
Step 1: Open the Local Group Policy Editor
- Press Windows key and R key together to open Run dialog, and type gpedit. msc.
- Click OK to continue.
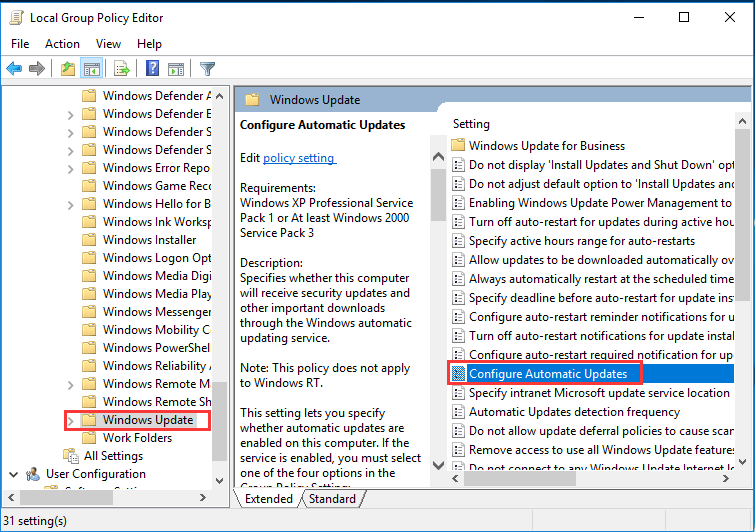
Step 2: Find out the Configure Automatic Updates
- In the left panel of Local Group Policy Editor window, please navigate to the Windows Update folder according to the path: Computer Configuration > Administrator Templates > Windows Components > Windows Update.
- Then choose Configure Automatic Updates in the right panel and double-click it.
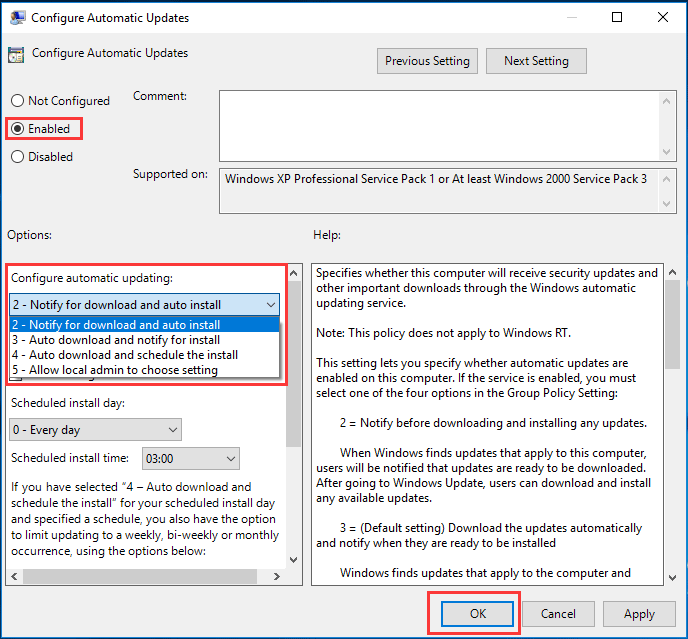
Step 3: Configure automatic updates
- In the popup window, choose Enabled to continue.
- Then choose Notify for download and auto install from the drop-down menu in the Configure automatic updating section.
- Click OK to continue.
When you have finished all the above steps, you can reboot your computer to turn off Windows 10 update.
![[SOLVED] Windows Update Cannot Currently Check for Updates](https://images.minitool.com/minitool.com/images/uploads/2018/11/windows-update-cannot-currently-check-for-updates-thumbnail.jpg)
Troubled by the issue Windows Updates cannot currently check for updates? This post shows 4 solutions to fix Windows update failed problem.
Solution 3. Change the Registry to Stop Windows Update
Now, we will show you the third solution to how to stop Windows 10 auto update. As a matter of fact, you can try to disable Windows 10 update registry to solve this problem. The following contents will show you the detailed steps.
However, one important thing you need to know is that changing registry is pretty risky since it may give rise to irreversible damage to your computer if you operate incorrectly. Thus, you had better create a system image before proceeding.
To back up Windows 10, you can try the professional Windows backup software – MiniTool ShadowMaker.
MiniTool ShadowMaker TrialClick to Download100%Clean & Safe
After having backed up the Windows 10, you can go on to change the Registry.
Step 1: Open the Registry Editor
- Press Windows key and R key together to open the Run dialog.
- Type regedit in the box and click OK to continue.
Step 2: Find out Windows folder
Navigate to the Windows folder based on the following path:
HKEY_LOCAL_MACHINE\SOFTWARE\Policies\Microsoft\Windows\WindowsUpdate\AU
Step 3: Change Value
From the right panel, double-click on the NoAutoUpdate (REG_DWORD) and set its value to 1. Click OK to confirm. After that, restart your computer to stop Windows 10 update download.

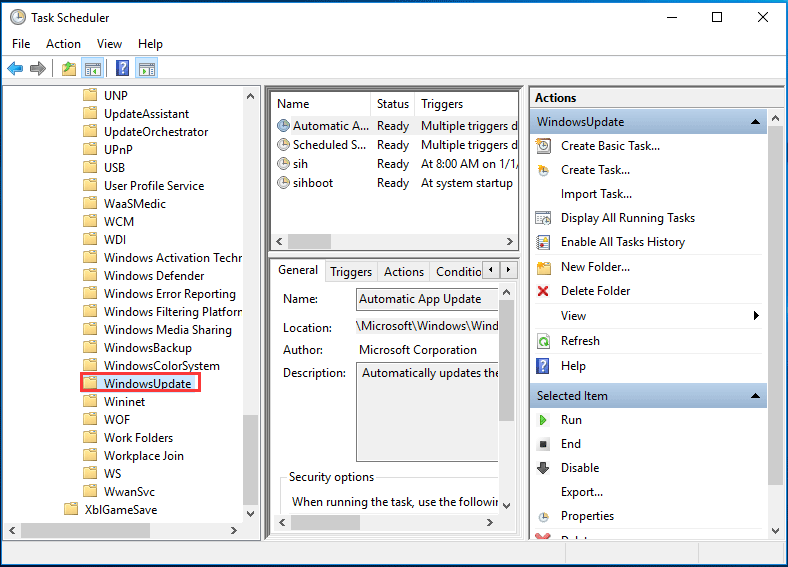
Solution 4. Disable Windows Update Tasks
In order to stop Windows 10 Update, you can try to disable Windows Update Tasks in Task Scheduler. We will show you how to disable Windows Update Tasks with step-by-step guide.
Step 1: Find out Windows Update in Task Scheduler
- Type Task Scheduler in Windows search box and choose the best-matched one.
- Open the Task Scheduler to enter its main interface.
- Navigate to the WindowsUpdate folder according to the path: Task Scheduler Library > Microsoft > Windows > WindowsUpdate.
Step 2: Disable Windows Update
- Right-click the Scheduled Start which is in the right panel.
- Then choose Disable to continue.
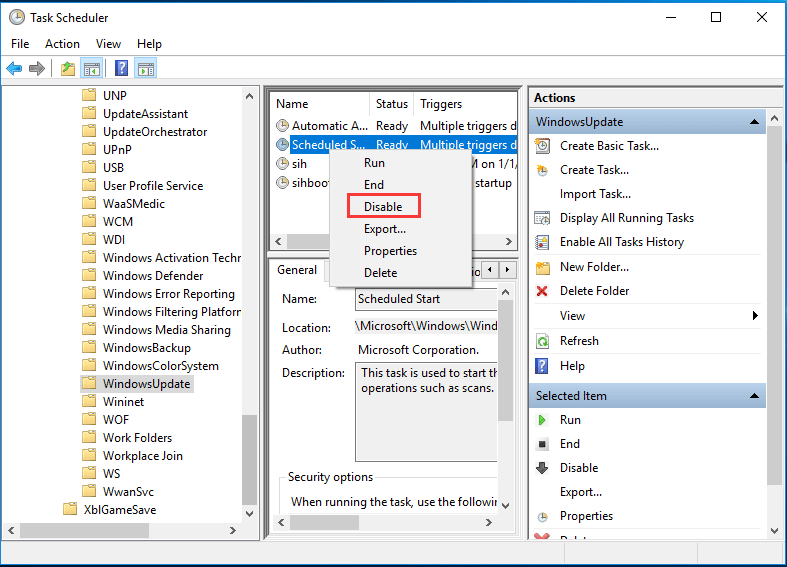
After that, you can close the Task Scheduler window and then you have successfully stopped Windows 10 update.
Solution 5. Meter Network Connection
As to how to stop Windows 10 update in progress, you can try to meter your network connection. But please note that this method only works on a Wi-Fi connection. So, it is not working for an Ethernet connection.
And now, we will show you how to meter the network connection to disable Windows 10 update.
Step 1: Select the Network & Internet
- Right-click Start button of Windows 10 and select Settings to continue.
- In the popup window, choose Network & Internet.
Step 2: Meter your network connection
- In the popup window, choose Status from the left pane to continue.
- Next, select Change Connection Properties.
- Then turn on Set as metered connection under Metered connection section.
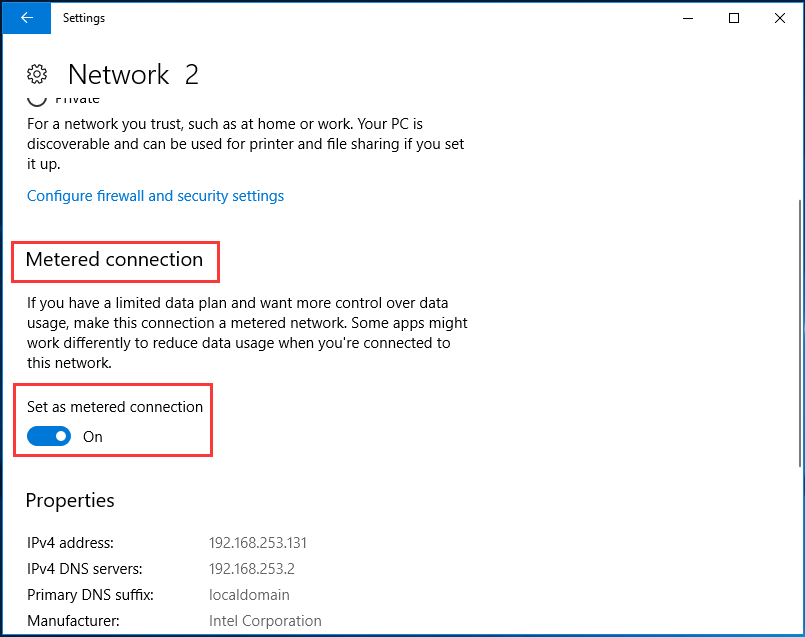
In this way, you can disable Windows 10 update since it required massive network connection.
Solution 6. Pause Windows Update for 35 Days
In this part, we will show how to stop Windows update in Windows 10 by pausing Windows update for 35 days. So if you want to stop Windows 10 update temporarily, you can try this way.
Step 1: Open Update & Security
- Right-click Start button of Windows 10 and click Settings to continue.
- In the popup window, choose Update & Security to continue.
Step 2: Pause Windows Update for 35 days
- In the popup window, please locate at the Windows Update in the left pane and choose Advanced Options in the right pane to continue.
- In the popup window, please locate at the Pause Updates section and turn on the button.
After that, this function enables you to stop Windows 10 update for 35 days. However, after the pause limit is reached, you’ll need to install the latest updates before you pause updates again.
Related article: How to Fix: Windows Update Stuck on Checking for Updates
Solution 7: Restore Windows 10 to Previous Version
At last, there is an available solution for you to stop Windows 10 auto update. It is to go back to previous version with the backup image. The precondition of this solution is that you have created a system image in advance.
In this way, you can go back to the previous version with this backup image even though you have updated your computer to the latest version.